Understanding webpack HMR beyond the docs
The webpack HMR docs are… not so good. They have some room for improvements.
So what do you do? You go out on a hunt to copy-paste webpack configs that you find in random GitHub repos and tutorials.
You just get it to work and then you don’t dare to touch it because you are afraid it will break.
That’s not very satisfying, is it?
Having code that you don’t really know how it works is risky. When you have some super weird bug then you might be in a situation where you have to debug and figure out how your build setup works at the same time.
Wouldn’t it be nice to know what’s going on under the hood and to have control over your build setup?
I have spent some days reading source codes and reverse engineering protocols. And I learned a lot about how HMR works.
Now I will share my findings with you!
HMR?
HMR (Hot Module Replacement) can give you a super smooth developer experience by automatically replace running code in the browser whenever you make a change to a source code file.
Learn more in Dan’s classical talk on the topic
Learning by analyzing
I have attacked this problem from many different angles. Reading docs was not enough. I have also read webpack source code, and reverse engineered an existing HMR app.
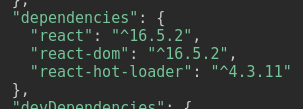
If you want to code along to this article, get the same project as I use. Go to createapp.dev and select React (and React hot loading which is autoselected when you pick React)
You will then have a minimalistic React project with webpack and HMR. If you want, you can click around a bit in the generated project to see what files are created.
Next, download a ZIP with the project by clicking the link under the editor on the page.

Unzip the project and then install the dependencies
unzip empty-project-react-react-hot-loader.zip
cd empty-project-react-react-hot-loader
npm install
And then start the app
npm start
Open http://localhost:8080. If you see hello jane, the app is running correctly!
Now let’s open the file src/index.js in Emacs. And change the word Hello to Hi. Save the file. Now the changes should be reflected in your browser automatically.

The webpack-dev-server
Ok, now that you have the project up and running on your machine, let’s analyze how it works.
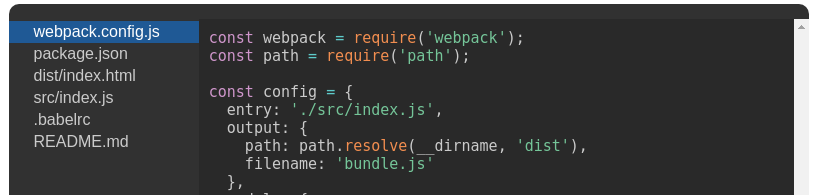
Webpack uses webpack-dev-server to start a development server. It’s added as a script in package.json

The development server is responsible for listening on the file system for code changes and trigger a new build whenever there is new code. The generated bundle is not saved to disk but it keeps it in memory.
Note that we pass in the —hot flag. This does two things:
-
It sets webpack-dev-server in hot mode. If we don’t use this it does a full refresh of the page instead of hot module replacement.
-
It automatically adds the plugin HotModuleReplacementPlugin. This plugin adds the “HMR runtime” into your bundle.
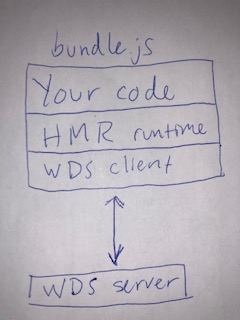
webpack-dev-server (WDS) also insert some code in the bundle that we call “WDS client”. It’s a bit confusing that webpack-dev-server also has client-side code, but that’s how it works.
The reason it has client side code is that it needs a way to communicate to the client.
Why must the server talk to the client you ask?
Because it must tell the client when a file has changed and new code can be loaded.
WDS server does this by opening a websocket connection to the WDS client on page load.
Analyzing the websocket calls
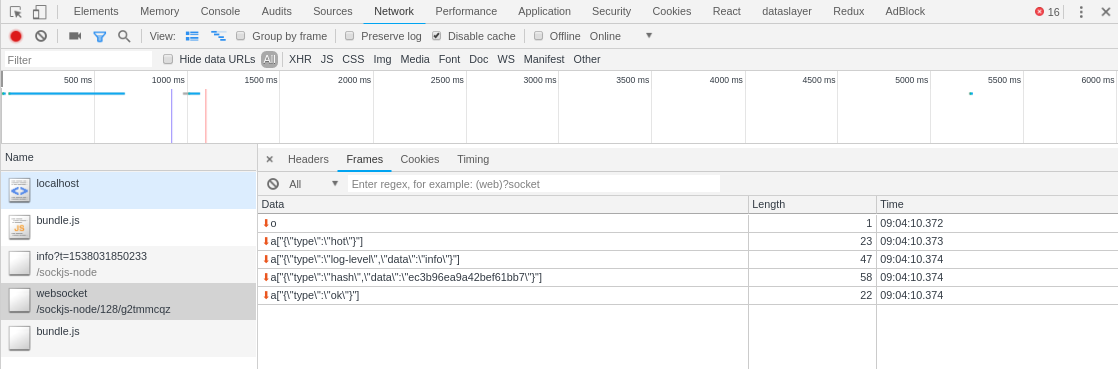
You can see how the websocket connection is initialized on page load in Chrome dev tools. Select the network tab, then click the websocket in the list to the left. Then select frames tab to the right.
Click for larger image
In here you can see what commands are sent from the WDS server to the WDS client when the page is loaded.
Ok, so there is a server that is responsible for listening for code changes, building and setting up a websocket connection to the client.
Let’s look into what happens when source code is changed.
-
The coder edits a file and press save in his editor.
-
WDS server picks up the change, and builds the whole project to a new bundle and saves it in memory, ready to serve it to the client.
-
It then sends a message on the websocket channel to the client indicating that there is new code
This is what the server sends to the client in the websocket channel

When the WDS client receives these websocket messages it tells the HMR runtime to trigger two downloads. First, it downloads what is the new manifest of the new module. Then it downloads the actual code for that module that has changed. We see these network-calls in the network tab of Chrome dev tools.

Now the HMR runtime has the new code for the modules that have changed.
How it loads the new modules
The HMR runtime that is inserted in your bundle gives your client access to the module.hot object which gives you access to the HMR API. The most interesting API function is module.hot.accept. This function accepts that a module should be replaced. This is an example:
if (module.hot) {
  module.hot.accept("./index.js", function () {
    // this is run when a new module is fetched
  })
}
This code accepts that index.js should be replaced. Whenever the HMR runtime has received some new code for the index.js, it calls the callback provided to module.hot.accept.
If you are using React (like in the project you created with createapp.dev ) you can use the react-hot-loader plugin.
To enable react-hot-loader, you wrap your root component with a HOC called hot
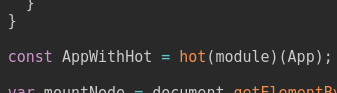
This plugin automatically calls the ReactDOM.render function whenever module.hot.accept callback function is called. This way the new code gets rendered and because of React diffing algorithm, only the new code gets rerendered.